I was over visiting the Creative Critters blog and Tammy is showing how she stores her ribbon. She asked her followers to post a photo of their ribbon storage. So....here is my little collection of ribbons. It is kind of a small collection....I think I need to think about restocking....it has been awhile since I went ribbon shopping ;)
I have the SnapWare ribbon holder (I also use these to store my circut cartridges!) for my rolls of ribbon and I have a floss container that can be found at Walmart or any craft store for a couple of dollars and you can find them at rummage sales lots of times for .25 ;) I have this ribbon stored in rainbow order.
Tuesday, June 29, 2010
Saturday, June 26, 2010
Giveaway - Cricut Mini Albums
Rina has just announced that when we have 200 followers there will be a give away over at the Cricut Mini albums blog. Come over and join us! Who doesn't love a good mini album?
www.cricutminialbums.blogspot.com
www.cricutminialbums.blogspot.com
Friday, June 25, 2010
Have you joined the Cricle?
I am excited to be a member of the Cricut Circle! I know there are lots of fun things in store for members of the Cricut Circle. Have you joined the Circle?
Thursday, June 24, 2010
What Awesome surprise is in store for us?
Did you all get the email? Provo Craft has "something amazing" coming and they are looking for people interested in getting this product first! Now who wouldn't want to be one of the firsts to play with a new provo craft machine? I am jumping up and down at the chance!!!!
If you didn't get the email here is a link:
http://www.cricut.com/blast/amazing0623.html
So...tell me....what do you think this AWESOME new "Something Amazing" is going to be?
If you didn't get the email here is a link:
http://www.cricut.com/blast/amazing0623.html
So...tell me....what do you think this AWESOME new "Something Amazing" is going to be?
Friday, June 18, 2010
Baby Girl mini album
Here is a quick little mini album I made for my cousin who just had a baby girl. I used Sweet Treats and Create a Critter. Check out the other great mini albums at the Cricut Mini Albums blog.
Thursday, June 17, 2010
Cake Pops
I saw a recipe for these fun cake pops and thought it would be fun to make for a last day of school treat for my kids classes. They were fun to make and I look forward to making more of these in the future.
They are easy to make! First bake a cake as directed. Then when it cools you need to crumble up the whole cake. You then mix the crumbled cake with one can of Cream Cheese frosting. Then roll into balls (this will be easier if you chill it first). If you want to make pops you can poke a sucker stick into each ball. Then dip the balls into some dipping chocolate and let cool to dry and decorate as necessary. You can set them in a piece of Styrofoam for drying. You can make them to match any theme!!!
I made apples for school :)
Wednesday, June 9, 2010
2010 End of the year teacher gifts.
Well...today is the last day my kids will be in K,2nd, and 4th grades :(
I was up until 2AM last night making some gifts for their teachers. The first one I got the idea from a fellow member of the Cricut Demo Army; Michelle.
Here is hers:


I was up until 2AM last night making some gifts for their teachers. The first one I got the idea from a fellow member of the Cricut Demo Army; Michelle.
Here is hers:
And here is mine:

And that is all the smarties candies that I had and then I had a huge bag of dum dums and I couldn't find a cute saying that I liked so I pulled up some Fuzzy Vinyl I just purchased from Winneconne Crafts and used the A Child's Year cartridge to cut out this perfect image.

And then I changed it up a bit for the last jar and I used Gypsy Wanderings for the last jar and cut a few phrases.

Sunday, June 6, 2010
Groovy Baby!
I just found a new challenge blog called Paper Playtime and thought I would take a moment and throw together a card. No fancy techniques tonight...just threw some paper on the cricut and threw it on the card :)
I used the Forever Young Cartridge. I created the word "groovy" with my Gypsy using the Mini Monograms cartridge. I simply merged the letters together to create the saying that I needed. The Forever Young cartridge is so much fun and the images are so easy to layer! Enjoy!
Saturday, June 5, 2010
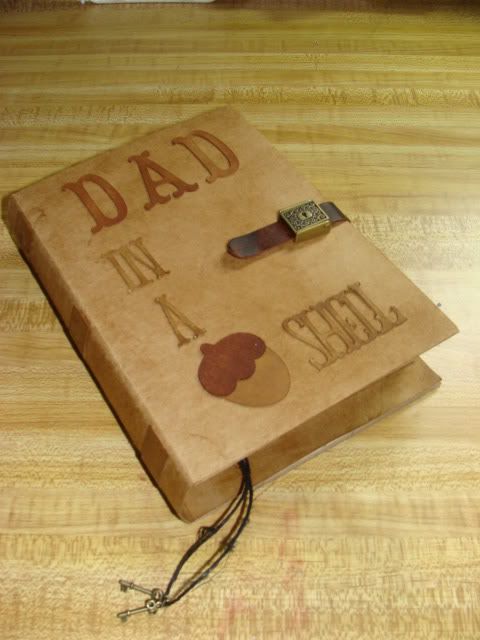
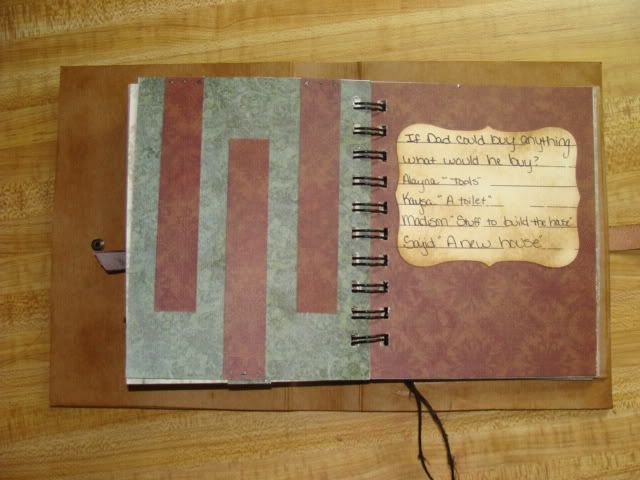
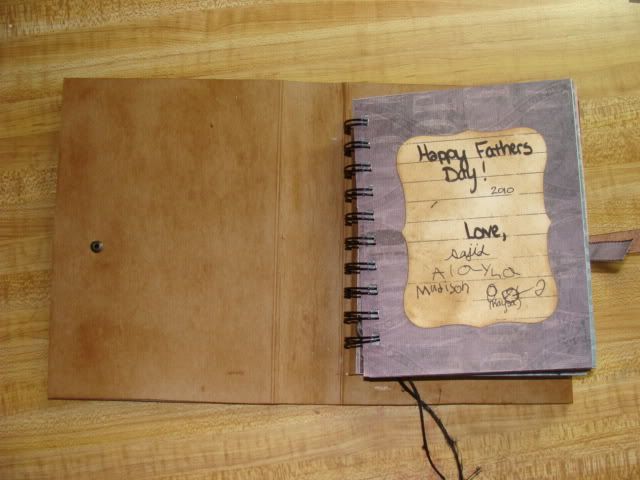
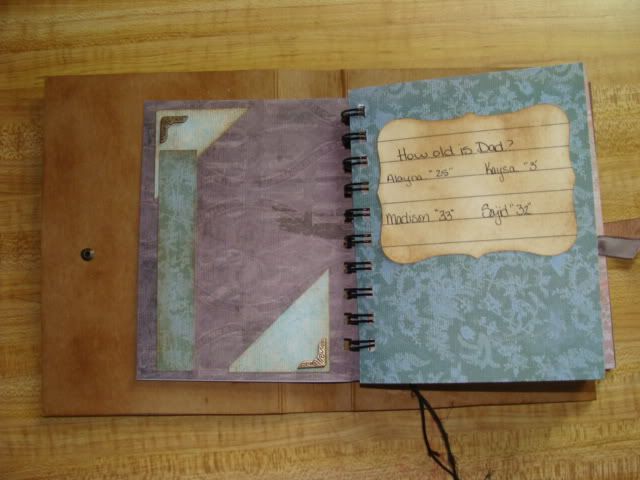
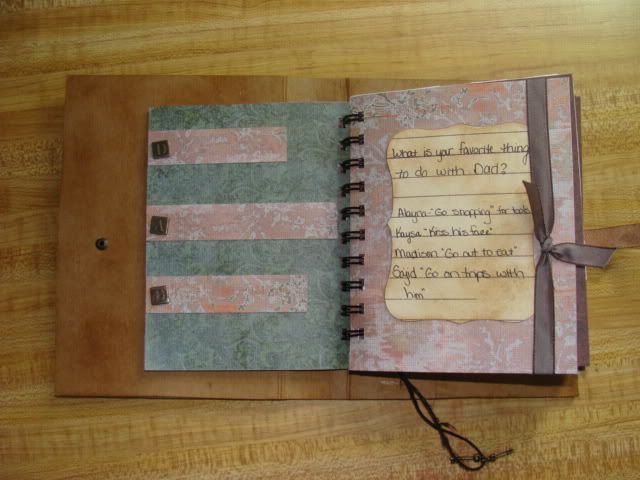
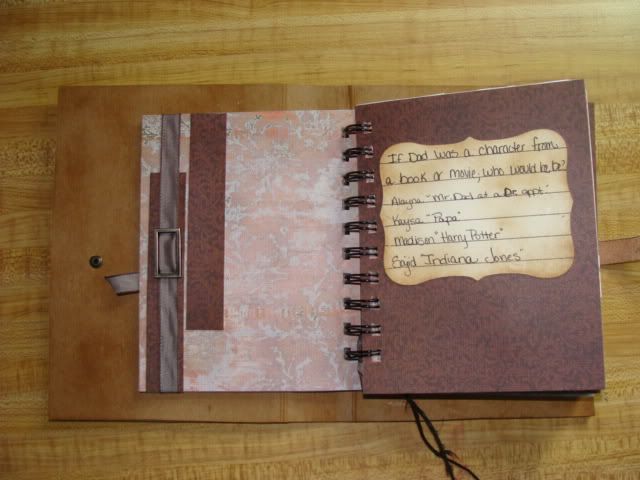
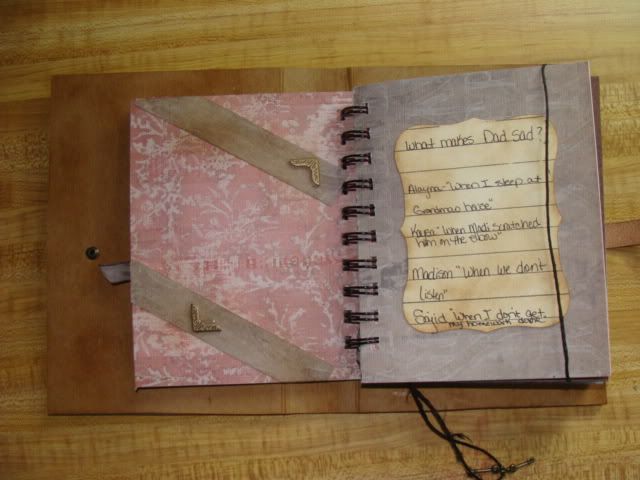
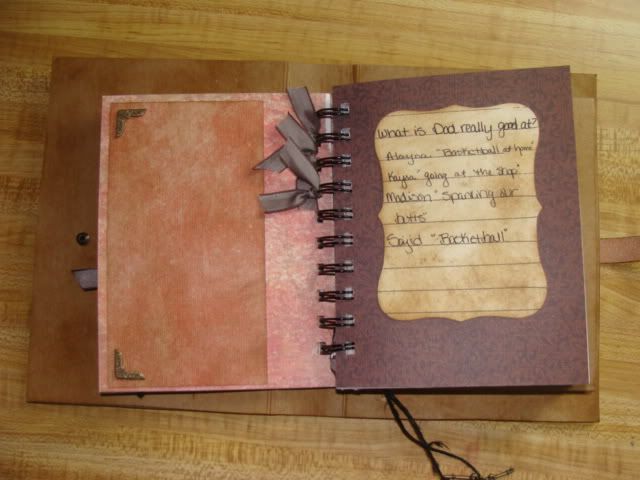
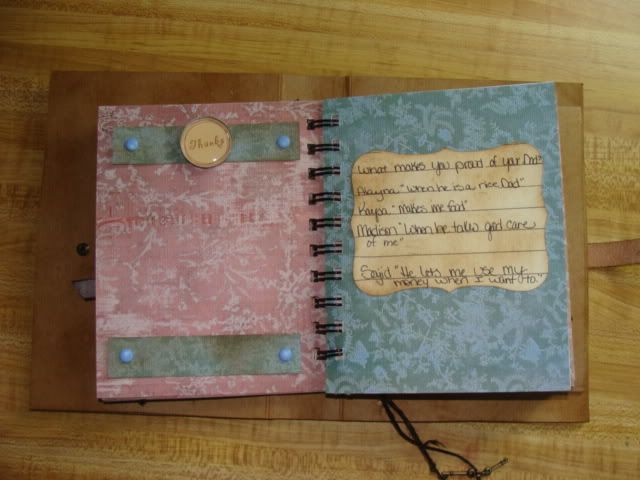
Dad in a Nutshell mini album
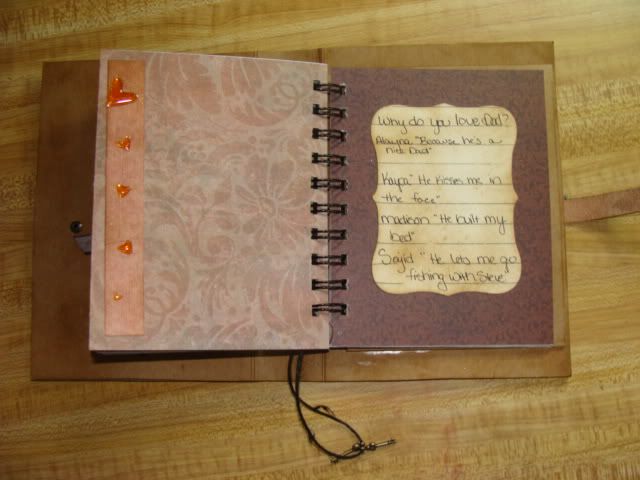
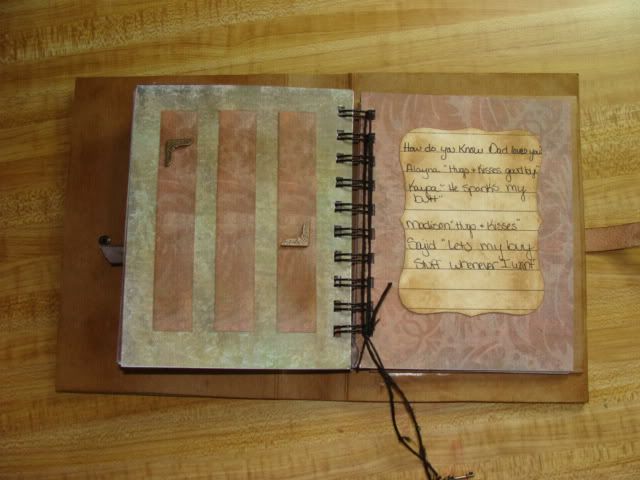
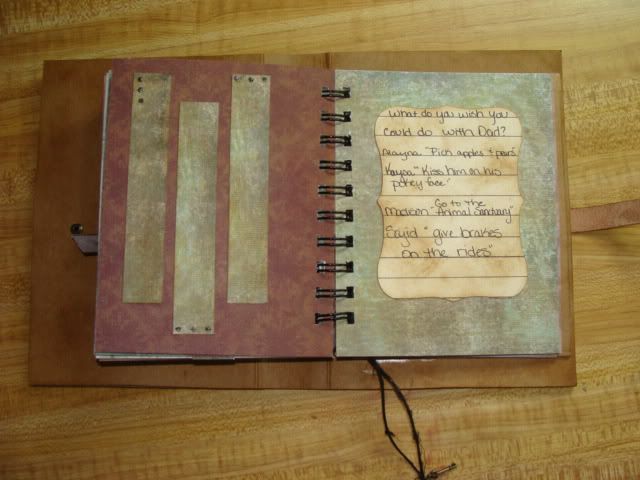
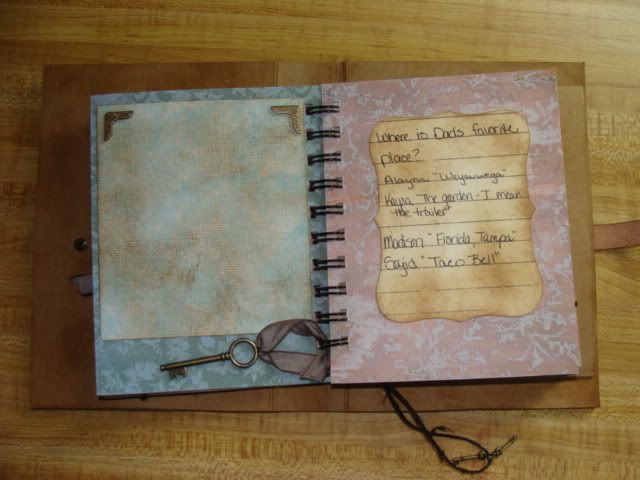
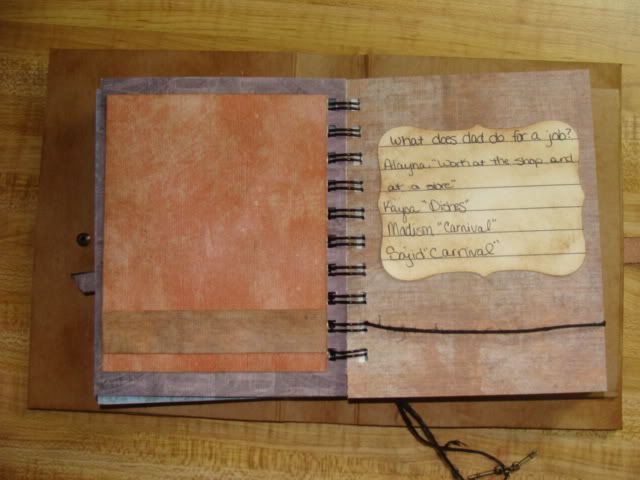
Here is my 2nd submission for the Cricut mini albums design team. I had so much fun making this album. I absolutely LOVE how it turned out.
It was very simple to make!
Supplies:
2 pieces thin cardboard cut to 7 x 11 1/2
2 pieces of thicker Cardboard cut to 5 x 7
Thin cardboard scraps (for title and spine details)
Patterned paper for pages
Orings
Bind it all
Embellishments
Cartridges I used: Storybook, Create-a-critter, Accent Essentials
Instructions:
1. Score the 2 thin pieces of cardboard at 5" and 6 1/2"
2. Rub the 1 1/2 center of the 2 pieces around a round object such as a broom handle to shape it. This will be the spine of your book.
3. Adhere a 5x7 piece of thicker cardboard to both sides of one thin piece of cardboard leaving the center 1 1/2 "spine" clear.
4. Adhere the 2nd piece of 7 x 11 1/2 thin piece of cardboard on top. Your book is now ready to decorate.
5. I found a super cute closure at Hobby Lobby awhile back and was waiting for just the right project and this was it! It is by Zutter and it is called Perfect Closures. It was super easy to attach! You can also punch holes at add some ribbon to tie it shut.
6. Cut title from thin cardboard and attach. (I used storybook for the title and Create a Critter for the Acorn. I used my Gypsy to merge the words together. I cut with settings: Blade 6; Pressure Max.)
7. For the inner pages I used a mat stack (I believe it was DCWV Old World) and cut the pieces down to 4 1/2" x 5 3/4" and I attached to pieces back to back. I also cut a piece of thin cardboard to the same size to attach the inner book to the outer shell of the book.
8. Create a pocket to slide the inner pages in to the back page of the album. I cut a piece of thin cardstock to 5"x7" and scored it 1/2" in on three sides. Attach this to the back page of your album and it creates a pocket to slide the inner album into.
8. Use the Bind-it-all to cut your holes and attach an o-ring. Make sure that your thin cardboard is the last page of your book.
9. Use the Bind-it-all to bind your inner album. I used a 3/4" 0-ring for this album but that will depend on how many pages you have. Make sure to place the thin carboard on the top of your book before binding. This will help to hid the opening in the 0-ring after you bind it.
10. Now Embellish your album as you wish. I used Accent Essentials to create the journaling tabs.
Thanks for looking! And...if you like it.....leave me a happy thought! It makes me smile!!!!!
Subscribe to:
Posts (Atom)
Finkydink Creations
Sketches and Challenges
- Card Ablilities
- Card Patterns
- Card Positioning Systems - Monday
- Card sketchbook
- Crafty Hos Challenge Blog
- Critter Sketch Challenge blog
- DAILY DARE 4 U
- Etsy Inspired Challenges
- Fantabulous Cricut Blog
- FELINE PLAYFUL
- Get your Sketch on - scrapbooking
- Let's Capture these sketches
- My little sketch blook
- Page Maps
- Peachy Keen Stamps
- Pencil Lines
- Pile it On
- Play Date Cafe
- Ribbon Carousel Challenge - Tuesdays
- Scrapbook Express
- Stamp Scrap and Doodle
- Stamping 411
- Stamptacular Sundays
- Stuck on Sketches
- The Shabby Tea Room
- The Sisterhood of Crafters
- Totally Gorjuss
Comment Counter - helps for give-a-ways :)
>


